Prepare your home plumbing for winter: 2026 guide
Preparing your home plumbing for winter is the process of protecting pipes, taps, and drains from freeze damage before cold weather arrives. In Australia, this is most relevant for homeowners in alpine regions, southern New South Wales, Victoria, and elevated areas around Brisbane and the Gold Coast, where overnight temperatures regularly drop below zero. Burst pipe repairs cost between $400 and $1,500, and water damage remediation adds $2,000 to $10,000 or more on top of that. The good news is that most freeze damage is entirely preventable with the right steps taken before the cold sets in.
Which pipes and taps are most at risk of freezing?
Not all pipes carry equal freeze risk. The most vulnerable are those closest to the outside air, with the least insulation between them and the cold.
Pipes in these locations are at highest risk:
- Exterior walls. Pipes running through or against outside walls lose heat quickly when temperatures drop overnight.
- Unheated garages and sheds. Any pipe supplying a laundry, workshop, or outdoor toilet in an unheated structure is exposed.
- Roof cavities and attics. Hot and cold water lines routed through roof spaces have no heating source nearby.
- Crawl spaces and subfloor areas. These spaces are often ventilated and uninsulated, leaving pipes exposed to cold air from below.
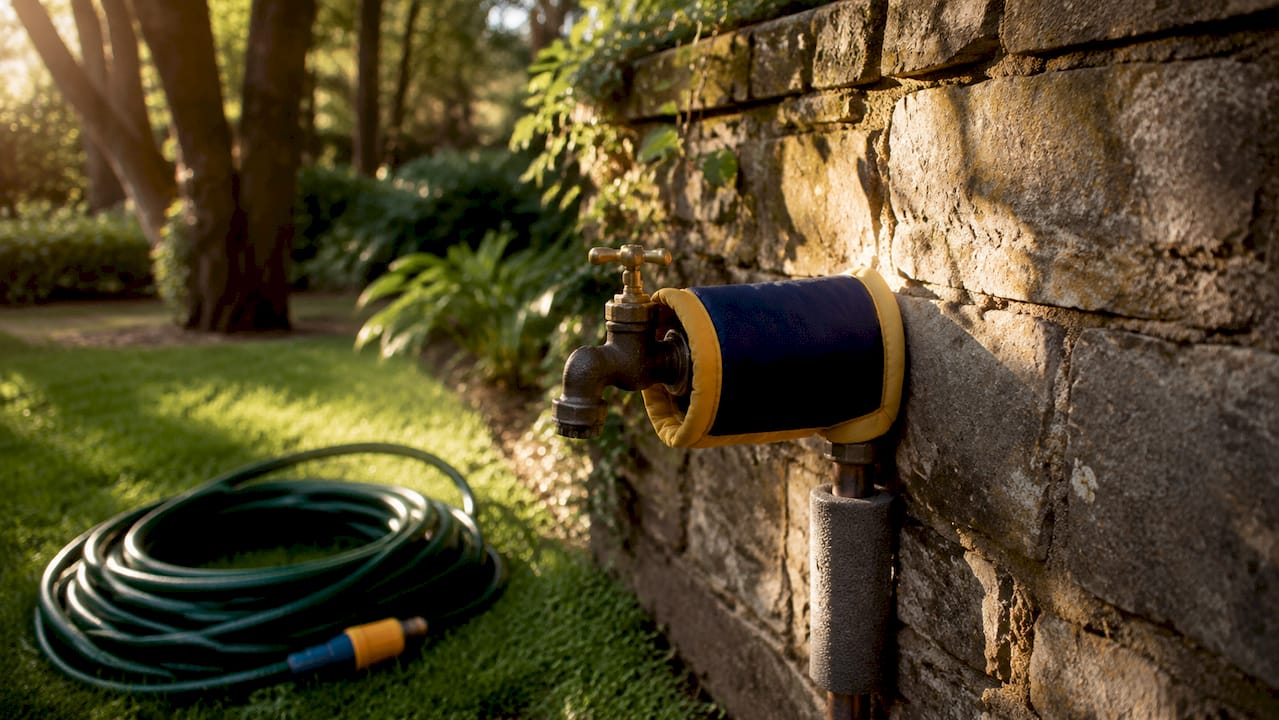
- Outdoor taps and garden hose connections. These are the single most common freeze point in Australian homes.
The physics behind a burst pipe is straightforward. Water expands by roughly 9% when it freezes. A pipe has nowhere to flex, so pressure builds until the pipe wall cracks or a joint fails. The burst itself often happens after the ice thaws, when water rushes through the damaged section. That delay means homeowners sometimes discover the damage hours after the freeze event, by which point water has already spread through walls and floors.
Leaving a garden hose attached to an outdoor tap traps water inside the pipe behind the tap. That trapped water has nowhere to drain, creating a high-pressure point inside the wall. This is one of the most common causes of internal pipe bursts, and it is entirely avoidable.
Pro Tip: Walk the perimeter of your home in autumn and note every outdoor tap, hose connection, and exposed pipe run. That list becomes your winter prep checklist.
How to insulate and protect vulnerable pipes and outdoor taps
Insulating pipes is the most direct way to protect plumbing for cold weather. The goal is to slow heat loss from the pipe so the water inside stays above freezing even when the surrounding air drops overnight.
Foam pipe sleeves
Foam sleeves are the most common and cost-effective option for indoor pipes in roof cavities, subfloor spaces, and garages. They slip over the pipe and are secured with tape or cable ties. Choose a sleeve with a wall thickness of at least 13mm for areas that regularly drop below 5°C.
Pipe wrap and fibreglass insulation
For pipes in awkward locations or irregular shapes, self-adhesive pipe wrap or fibreglass batting works well. Wrap from the bottom of the pipe upward, overlapping each layer by half its width to avoid gaps. Gaps are where freeze damage starts.
Heat-tracing cables
Heat-tracing cables installed along the bottom of a pipe, then covered with foam insulation, provide active freeze protection for the most exposed runs. These cables draw a small amount of electricity to keep the pipe surface above freezing. They are the right choice for pipes in unheated spaces that cannot be relocated.
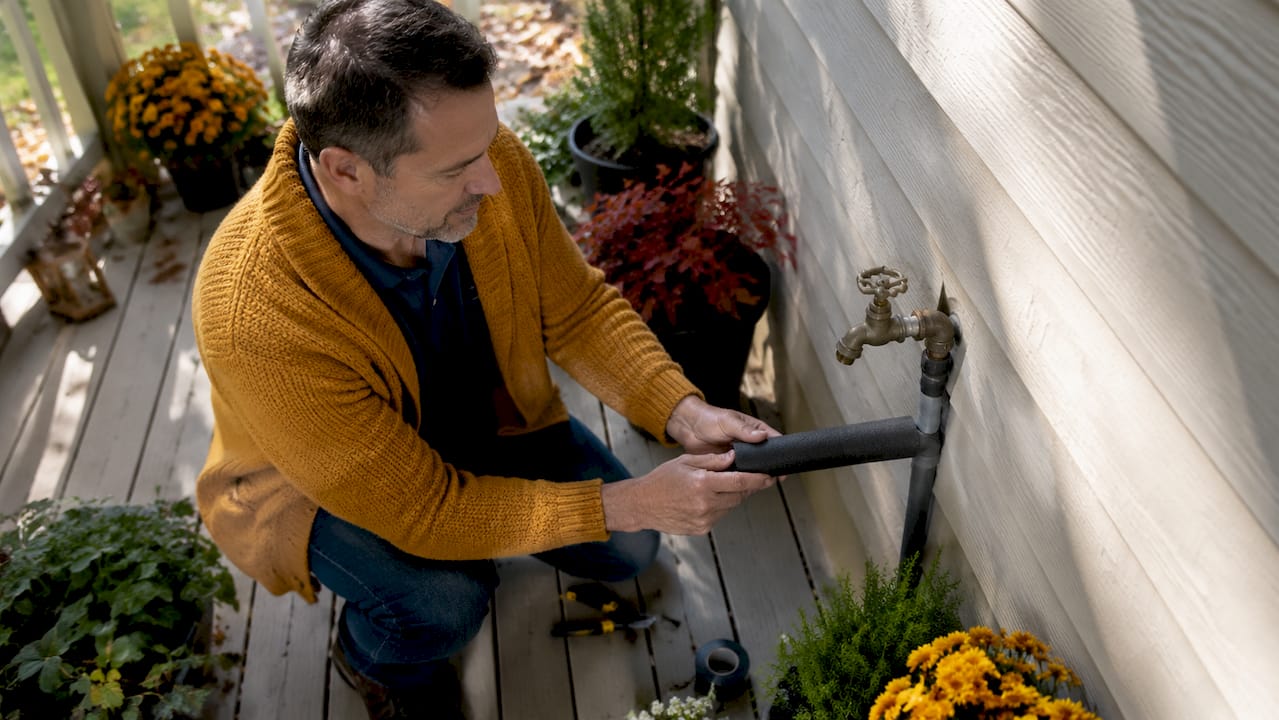
Outdoor tap protection: a step-by-step approach
- Turn off the tap fully and disconnect the garden hose.
- Drain any remaining water from the hose and store it indoors or in a shed.
- Fit an insulated tap cover over the outdoor tap. These are available at most hardware stores for a few dollars.
- If you are upgrading, consider replacing standard outdoor taps with frost-free sillcocks. These have an internal shutoff seat located inside the heated wall cavity, and they self-drain when turned off. They cost $25–$40 plus installation time.
Pro Tip: When fitting foam sleeves in a roof cavity, use a head torch and take your time. A rushed job with gaps in the insulation is almost as bad as no insulation at all.
How to maintain indoor temperature and water flow to prevent freezing
Consistent indoor heat is the most reliable defence against frozen pipes. Experts recommend keeping indoor temperature above 13°C at all times during winter, even when the home is unoccupied. That threshold keeps the air around interior pipes warm enough to prevent freezing.
A common mistake is setting the thermostat very low when leaving for a holiday. The thinking is to save on heating costs, but the saving is rarely worth the risk. A burst pipe while you are away means water running unchecked for hours or days.
The following habits reduce freeze risk during cold snaps:
- Keep cabinet doors under kitchen and bathroom sinks open on very cold nights. This lets warm room air circulate around the pipes inside.
- If you are leaving the home for more than a few days in winter, shut off the main water supply and drain the system by opening taps at the lowest point of the house.
- Ask a neighbour to check the home every day or two during extended absences.
- Know where your main water shut-off valve is before you need it. In an emergency, every second counts.
The truth about letting taps drip
Letting a tap drip during freezing conditions does reduce freeze risk. A small, continuous drip requires only a fraction of a litre per hour but keeps water moving through the pipe, which resists freezing. However, this is a mitigation strategy, not a complete solution.
A dripping tap only relieves pressure in the pipe. If a section of pipe becomes fully blocked by ice, the drip cannot prevent a burst. Insulation and heat are the primary defences. A dripping tap is the backup.
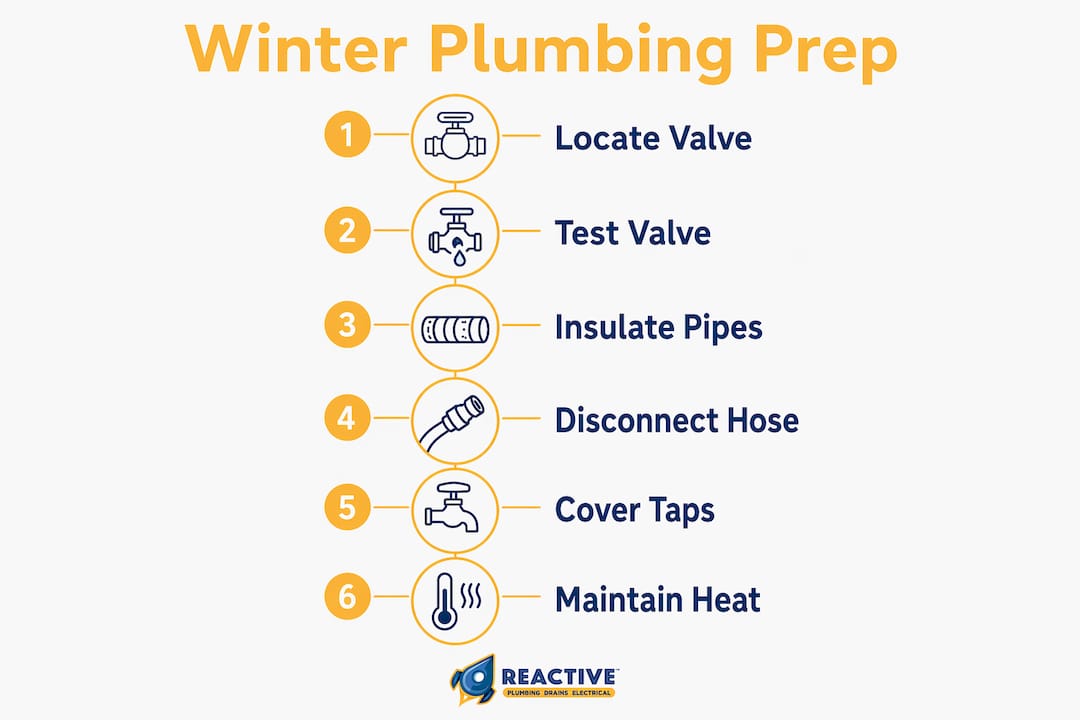
Step-by-step checklist for winter plumbing preparation
Follow this process before the first cold snap of the season. Scheduling maintenance well before the first frost gives you time to order materials, book a plumber if needed, and avoid the rush that follows the first freeze event.
- Locate your main water shut-off valve. Test it to confirm it opens and closes fully. If it is stiff or leaking, have it serviced before winter.
- Inspect all exposed pipes. Check roof cavities, subfloor spaces, garages, and exterior walls. Note any uninsulated sections.
- Fit foam sleeves or pipe wrap to every exposed pipe run. Pay particular attention to pipes on south-facing exterior walls.
- Disconnect and drain all garden hoses. Store them indoors. Fit insulated covers to all outdoor taps.
- Open under-sink cabinet doors on cold nights to allow warm air to reach pipes inside.
- Clear external drains and gutters. Blocked drains can cause water to pool and freeze around the home’s foundations, increasing pressure on underground pipes. Our guide on clearing blocked stormwater drains covers this in detail.
- Plan for extended absences. If leaving for more than three days, shut off the main supply and drain the system.
- Book a professional inspection. A licensed plumber can identify risks you may have missed, particularly in older homes with pipes in non-standard locations.
| Task | When to complete |
|---|---|
| Locate and test main shut-off valve | Early autumn |
| Insulate exposed pipes | Before first cold snap |
| Disconnect and store garden hoses | Before overnight temps drop below 5°C |
| Clear gutters and external drains | Mid-autumn |
| Book professional inspection | At least four weeks before winter |
For a broader view of year-round plumbing care, the home plumbing maintenance checklist from Reactive Plumbing & Electrical covers seasonal tasks across all four seasons.
Key takeaways
Protecting your home plumbing from winter freeze damage requires insulating exposed pipes, maintaining indoor temperatures above 13°C, disconnecting garden hoses, and booking a professional inspection before cold weather arrives.
| Point | Details |
|---|---|
| Identify vulnerable pipes first | Focus on exterior walls, roof cavities, subfloor spaces, and outdoor taps. |
| Insulate before the cold arrives | Foam sleeves, pipe wrap, and heat-tracing cables all reduce freeze risk significantly. |
| Disconnect garden hoses every year | Leaving hoses attached traps water and causes internal pipe bursts behind the wall. |
| Keep indoor temperature above 13°C | This applies even when the home is unoccupied during winter. |
| Book a professional check early | Service demand spikes after first frost; early inspections avoid emergency call-out costs. |
What most homeowners get wrong about winter plumbing prep
Every winter, we see the same pattern. A homeowner does most things right. They insulate the pipes in the roof cavity, they keep the heating on, and they think they are covered. Then they come home from a week away to find water pouring through the kitchen ceiling. The culprit is almost always the garden hose, still attached to the outdoor tap, still full of water.
Disconnecting garden hoses is the simplest step on the entire list, and it is the one most often skipped. It takes two minutes. The repair it prevents takes two weeks and costs thousands.
The other thing I see underestimated is the value of a professional inspection for older homes. Pipes in homes built before the 1980s are often routed in ways that made sense at the time but leave long sections exposed in unheated spaces. A licensed plumber will spot those runs quickly. For homes with ageing pipes, pipe relining over traditional replacement is worth understanding before a winter emergency forces the decision. Relocating pipes from exterior to interior walls during a renovation is the permanent fix, but relining can extend the life of existing pipes significantly.
The cost argument for prevention is not subtle. Burst pipe repairs start at $400 and climb fast. Water damage remediation adds $2,000 to $10,000 or more. An hour of your time in autumn and a bag of foam sleeves from the hardware store is the better investment by a wide margin.
— Brent
Reactive Plumbing & Electrical: winter plumbing services
Winter plumbing preparation is straightforward when you know what to look for. When you are not sure, a professional inspection before the cold arrives is the most cost-effective decision you can make.

Reactive Plumbing & Electrical provides licensed plumbing inspections, pipe insulation services, frost-free tap installations, and emergency drain clearing across Sydney, Newcastle, Wollongong, Brisbane, Ipswich, and the Gold Coast. Our team is available 24/7 for emergency repairs, and we carry the materials to address most winter plumbing issues in a single visit. If your home has older pipes that need more than insulation, ask us about pipe relining options as a long-term solution. Contact Reactive Plumbing & Electrical before the first cold snap to book your pre-winter inspection.
FAQ
What temperature causes pipes to freeze in Australia?
Pipes begin to freeze when the surrounding air temperature drops below 0°C for a sustained period. Homes in alpine areas, southern New South Wales, and elevated parts of Victoria and Queensland are most at risk.
How do I protect outdoor taps from freezing?
Disconnect and store garden hoses, then fit an insulated tap cover over each outdoor tap. For a permanent solution, replace standard taps with frost-free sillcocks, which self-drain when turned off and cost $25–$40 plus installation.
Does letting a tap drip really prevent frozen pipes?
A dripping tap reduces freeze risk by keeping water moving, but it is not a complete solution. If a pipe section becomes fully blocked by ice, the drip cannot prevent a burst. Use insulation and consistent indoor heat as your primary protection.
What should I do if I am leaving home for winter?
Shut off the main water supply and drain the system by opening taps at the lowest point of the house. Keep the heating set to at least 13°C if you cannot drain the system, and ask a neighbour to check the property regularly.
How much does a burst pipe repair cost?
Burst pipe repairs typically cost $400 to $1,500, with water damage remediation adding $2,000 to $10,000 or more depending on the extent of the damage. Prevention through insulation and preparation costs a fraction of that.